


Glue Down Vinyl Plank – Installation Guide & Product Overview
Glue Down Vinyl Plank: A Durable, Professional-Grade Flooring Solution
Glue Down Vinyl Plank (GDVP) is a popular choice among builders, renovators, and commercial installers because of its durability, stability, and seamless appearance. Unlike floating click systems, glue-down floors bond directly to the subfloor, creating a sturdy and long-lasting finish perfect for high-traffic environments.
This guide covers what Glue Down Vinyl Plank is, where it performs best, and how to install it properly.
What Is Glue Down Vinyl Plank?
Glue Down Vinyl Plank is installed using either:
- Pressure-sensitive adhesive (PSA)
- Hard-set adhesive
It is typically thinner than click vinyl flooring but offers exceptional stability once adhered. Because the planks are bonded directly to the subfloor, they resist shifting and movement and are ideal for large rooms and heavy-use areas.
Best Applications
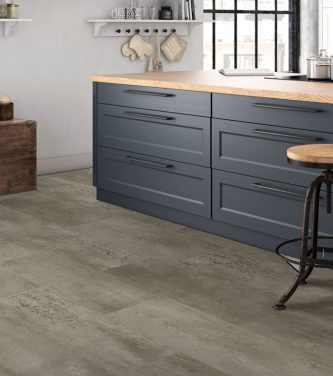
- Kitchens
- Retail and commercial spaces
- Basements
- Condos and apartments
- Anywhere that requires strong sound control and durability
Why Choose Glue Down Vinyl Plank?
- Commercial-grade durability
- Quieter underfoot compared to tile
- Smooth, seamless appearance
- Excellent for large, open areas
- Suitable for mobility devices (flat, stable surface)
Tools & Materials You’ll Need
- Approved vinyl flooring adhesive
- Flooring trowel (correct notch size per adhesive manufacturer)
- Utility knife with sharp blades
- Straightedge or square
- 75–100 lb flooring roller
- Chalk line
- Measuring tape
Subfloor Preparation
Subfloor preparation is one of the most important steps in a glue-down installation. Any imperfections in the subfloor can telegraph through the finished floor, affecting appearance and performance.
Your subfloor must be:
- Clean – free of dust, paint, grease, and debris
- Dry – within the moisture limits of the flooring and adhesive
- Smooth – no raised edges or seams
- Level – within the manufacturer's flatness tolerance
Step 1: Plan Your Layout
Before applying adhesive, lay out several planks to determine the direction and pattern. Check colour variation between boxes and ensure that both your first and last row will be a manageable width.
Step 2: Snap a Reference Line
Use a chalk line to create a straight reference line. This will keep your first row perfectly aligned and ensure the entire installation remains straight.
Step 3: Spread the Adhesive
Using the recommended trowel notch size, spread adhesive in a controlled, workable area. Many pressure-sensitive adhesives require time to dry to a “tacky” state before planks are placed. Always follow the instructions on the adhesive container.
Step 4: Lay the Planks
Once the adhesive is ready, place planks carefully into position along the reference line. Maintain tight seams and avoid sliding planks sideways after contact with adhesive. Ensure rows are straight and joints are staggered for a natural appearance.
Step 5: Roll the Floor
After installing each section, use a 75–100 lb flooring roller in both directions to ensure full contact with the adhesive. This step removes air pockets and increases long-term bond strength.
Step 6: Allow for Cure Time
General guidelines:
- Avoid heavy traffic for at least 24 hours.
- Do not replace furniture until adhesive has fully cured.
- Avoid wet mopping for 48 hours.
Ongoing Care & Maintenance
- Sweep or vacuum regularly to prevent scratching.
- Damp mop with vinyl-safe cleaners only.
- Avoid abrasive pads or harsh chemicals.
- Use felt pads under furniture legs.
When installed correctly, Glue Down Vinyl Plank provides a long-lasting, durable, and professional-grade flooring solution for both residential and commercial spaces.